Blemishes may be made on glass windows and this may lessen the clarity and the general appearance of your house or car. The growing weather patterns of Toowoomba mean that glass surfaces are regularly exposed to dust, debris, and unwanted contacts with the tools or outdoor equipment that may cause noticeable scratches with time.
Luckily, a glass scratches remover may be used to repair the shallow scratches on the glass surface by polishing with care the small scratches so that the appearance and vision can be enhanced without being as expensive as replacing the entire window.
Glass scratch removers are designed to level the scratched section of the glass by a specialised polishing compound that is gentle in nature. When properly applied, they can be very helpful in eliminating or at least diminishing light scratches and putting the glass back to a more finished appearance.
In this article you will get to know about glass scratch remover, how it works, when a DIY process can be appropriate and when it is better to use professional services. Properly done, windows in residential, business, or vehicles throughout Toowoomba can in most cases be returned to a clean, polished appearance.
Why Do Toowoomba Windows Get Scratched?
Toowoomba’s weather and lifestyle can spell trouble for glass. Sudden storms or garden “blitz” days can send grit and leaves flying. Even a stray branch or a child’s toy can leave faint lines on car windscreens or patio sliders.
In our sunny uplands, dust storms sometimes reduce visibility and create microscopic abrasions. Even checking the mail or cooking on a BBQ can backfire: small particles embedded in chook buckets or barbecue grit can score glass when wiped.
Short-term: these scuffs may seem like cosmetic annoyances. Long-term: they catch light and grow, clouding visibility. Worse, hard rains or hail can break glass entirely. A scratch remover won’t fix shattered panes, but it’s perfect for those pesky streaks and scrapes that happen long before disaster strikes.
How Glass Scratches Happen
- Cleaning missteps: Using the same towel on your tinted window and a gravel driveway, then wiping the glass – ouch.
- Wiper woes: Old or debris-gripped wiper blades can etch faint arcs.
- Tiny projectiles: Even buffeting sand or a stone chip can cause surface marks.
- Everyday life: Rinsing blinds, handling tools, or even hail can leave swirl marks or micro-scratches.
Understanding why scratches occur helps us appreciate how a Glass Scratch Remover works: by countering these forces with science and a little elbow grease.
What Is a Glass Scratch Remover?
A Glass Scratch Remover is typically a polishing compound or kit designed to erase or minimize glass marks. It’s not a magic potion, but rather a fine abrasive or polishing paste often combined with a buffing process. These minute, gritty particles work like ultra-fine sandpaper but one that swirls and melts the damage away.
In practice, a remover kit often includes pads, polish, and sometimes a handheld polisher. As one industry source explains, modern systems use heat and friction rather than sanding away glass.
The process smooths out scratches rather than gouging them deeper. In fact, after treatment with a quality scratch remover, the glass can look “without trace of the intervention” essentially as clear as before the scratch.
Many professionals say even deep, visible scratches can be handled with these systems. The secret is a combination of polishing pastes and controlled polishing action.
How Does It Work?
At first glance, rubbing more material on a scratch might seem counterintuitive. But glass is surprisingly hard and brittle under a microscope. Here’s the trick: glass has tiny crystalline edges, and everyday grit embeds in them, creating an etched or scratched look.
Polishing compounds exploit the fact that the glass is actually harder than most polishing abrasives. They remove the microscopic high points around the scratch without cracking the underlying glass. In short: they grind only the dirty, damaged bits away.
Practical steps in scratch removal often include:
- Cleaning: Remove all dust and grease around the scratch.
- Applying Polish: A dab of abrasive paste (e.g., cerium oxide mix) goes on a soft felt or foam pad.
- Buffing: Using a polisher or hand-pad, you work the polish over the scratch with light pressure. Keep it moving the goal is to gently melt or wear down the etched edges.
- Repeat: Often, scratches fade after a few passes. Inspect frequently under good light.
- Final Clean: Wipe off residue; you may apply a glass cleaner afterwards for a streak-free shine.
According to experts, “most scratches can be removed in a couple of minutes” with the right gear. And because the compounds are water-based and safe, there’s minimal risk to coatings or tints; the only casualty is the scratch itself.
DIY Methods vs Professional Kits
For minor surface haze or very light marks, even household items can help. Toothpaste, for example, has a mild abrasive ingredient. Rubbing a non-gel toothpaste in a circular motion and then wiping it off can sometimes buff very fine swirls.
A baking soda paste is another home trick for light scuffs. These methods essentially use gentle abrasion. They’re cheap and useful for tiny blemishes, but they have limits.For deeper or more stubborn scratches, you’ll need real glass polishes.
For official information about Vehicle safety and environment standards in Australia, you can refer to resources from the Australian Government Department of Infrastructure, Transport, Regional Development, Communications and the Arts. The department manages national vehicle safety policies and the Australian Design Rules that ensure vehicles meet the required safety and environmental standards on Australian roads.
A quick DIY table summarizes the options:
| Method | Pros | Cons | Best For |
| Toothpaste / Baking Soda Paste | Inexpensive, readily available | Very light effect, limited to superficial haze | Very shallow surface scratches |
| Glass Polish (Cerium Oxide)** | Effective on moderate scratches, DIY-friendly | Requires time and elbow grease; not for deep gouges | Light to moderate scratches |
| Professional Scratch-Removal Kit | Most effective, fast results | Higher cost, specialized equipment | Deep, visible scratches in auto/home |
| Mobile Glass Repair Service | Quick, guaranteed results | Expensive, scheduling may be needed | Severe scratches or damage |
Specialized Scratch Remover Kits
There are dedicated scratch-removal kits on the market. Many are marketed to collision repair shops or serious DIYers. For example, the GlasWeld GForce system uses a special heat-and-friction method: technicians use a powered pad and proprietary polishing pastes to eliminate deep scratches without leaving any distortion.
The idea is not to grind away all the glass, but to “smooth out the damage.” These kits can work on windshields, tempered shower screens, laminated storefront windows, and more. Companies often note that after using their kit, there’s effectively no evidence a scratch ever existed.
Typical contents of a commercial kit include:
- Abrasive/Pastels: Several grades of polishing compound (from coarse to fine).
- Buffing Pads: Felt or foam discs (to attach to a drill or polisher).
- Polisher: Some kits include a small battery-powered or pneumatic rotary tool; others assume you have one.
- Cloths: Microfiber towels to wipe away residue.
- Instructions: Steps and safety info.
Using such a kit is similar to car paint buffing, but remember: you’re working on glass, so smooth, consistent pressure is key. Over-sanding can create a pit, so always start gently.
If you’re handy with a drill, many homeowners find decent results. But if the job feels daunting, a professional glazier has specialized machines and the guarantee of no weird lensing effects.
When to DIY and When to Call a Pro
In many cases, minor scratches are quite fixable at home. If it’s a hairline scar from a tree branch or fine swirls from hand wipes, a glass polish and some time can do wonders. You’ll save money and feel pretty proud buffing that sucker out yourself.
However, know your limits. As car-care experts note, “that’s a problem most amateur detailers cannot resolve themselves” when it comes to serious windshield damage. A cracked or heavily gouged pane is best left to a shop.
For deep glass scratches that interfere with vision, or if a quick fix hasn’t worked, it pays to see a professional. They have the tools and expertise to restore clarity correctly.
It’s also wise to consider warranty and safety. Many modern windscreens have sensors and coatings. Removing a scratch incorrectly could void warranties or distort camera lines.
Likewise, a home remedy gone wrong could even worsen a scratch. On the plus side, professional repair shops sometimes bill damage to insurance, whereas DIY kits are out-of-pocket.
For lighter damage, though, DIY is fun and effective. To maximize success:
- Work in shade: Avoid direct sun, which can dry polish too fast.
- Keep glass damp: Moisture prevents heat buildup from friction.
- Check progress often: Use a magnifying glass or move to sunlight to see if the scratch is fading.
- Don’t rush: If a scratch is stubborn, multiple passes (with cleaning in between) will gradually lessen it. Rushing can gouge new pits.
Glass Scratch Remover in Practice
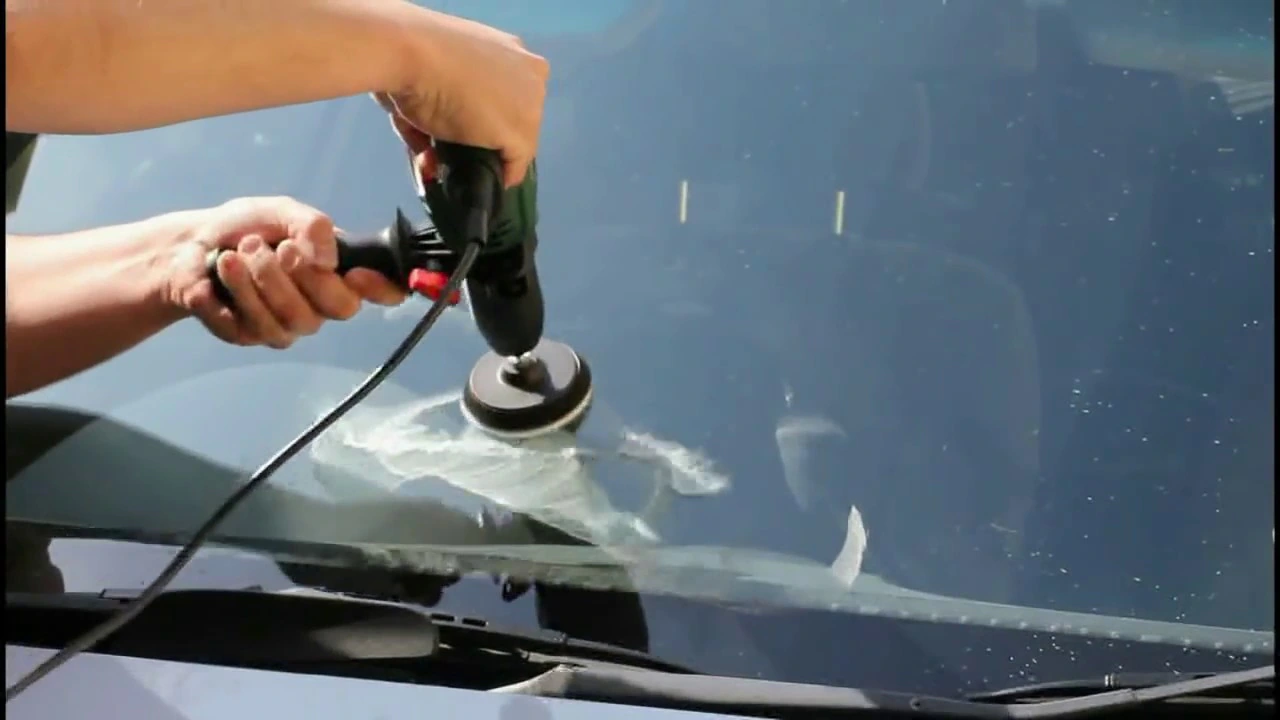
Here’s how a typical auto enthusiast might use a Glass Scratch Remover kit on a Toowoomba car window:
- Assessment: Park in shade and inspect the scratch. Is it deep? Or just a surface scuff you can feel with a fingernail? Only the latter is fully fixable with polish.
- Clean: Wash and dry the window. Remove any residual dirt with a quality glass cleaner.
- Prep: Secure the car or window. If using a drill, attach a velcro polishing pad. For manuals, have a soft cloth or pad ready.
- Apply Paste: Squeeze a little Glass Scratch Remover compound onto the pad. You only need a small dot.
- Buff: At low speed (if machine) or gentle hand motion, rub over the scratch. Keep moving around the mark – don’t hold in one spot too long. Think of circling a target to remove edges evenly.
- Wipe & Inspect: After a minute or so, stop and wipe off residue with a microfiber cloth. Inspect in sunlight or under bright indoor light. Did the scratch lighten? If yes, repeat. If not, switch to a finer pad or consult a pro.
- Seal: Once the scratch is gone or minimized, clean the window with fresh glass cleaner. Optionally, apply a thin layer of carnauba wax to seal and protect the area; it adds a repellent layer to help prevent new scratches.
Conclusion: Clear Views Ahead
Toowoomba life is too scenic to spend squinting through etched windows. With a bit of elbow grease, the right Glass Scratch Remover, and careful technique, you can often bring those windows back to clarity. Whether it’s your car, kitchen splashback, shower screen, or the local hipster cafe’s new glass door, these methods apply.
If you have minor scratches or want to avoid costly replacements, try a trusted glass polish kit – and follow this guide. If something feels beyond DIY, reach out to a professional glazier. Your view of The Bunya Mountains should be unobstructed.
In no time, your windows will be as pristine as on installation day and you’ll wonder why you ever missed it. If in doubt, check out Turtle Wax’s guide or similar expert advice to ensure you use the right tools and techniques.
Don’t let scruffy glass dampen your view. Try a Glass Scratch Remover kit today or Call us to book a local window repair service in Toowoomba. Clear windows are just a buff away!
FAQS:
Is Glass Scratch Remover able to remove all window scratches in Toowoomba?
Glass Scratch Remover is a product that is capable of repairing light to moderate scratches on windows and windscreens in Toowoomba. Nevertheless, extremely deep scratches or broken glass can also lead to the need to repair or replace the glass by a service specialist.
Can a Glass Scratch Remover be used on windscreens in Toowoomba?
Yes, a Glass Scratch Remover is normally safe on the windscreens when applied properly. A lot of car owners in Toowoomba polish their cars using compounds to remove small wiper marks and scratches on the surface without damaging the glass.
Toowoomba Glass Scratch Remover: Do I need professionals in Glass Scratch Remover?
When the scratch is deep or a large area is covered, it is better to pay professionals who propose its service Glass Scratch Remover in Toowoomba. Specialised polishing tools are used by experts and do not distort but restore the clarity.
What is the duration of Glass Scratch Remover in Toowoomba?
Average Glass Scratch Remover TVA within Toowoomba takes 15 minutes to one hour depending on the depth of the scratch. Repair can be done by professional services, and they can finish faster with the help of high-tech systems of polishing.